
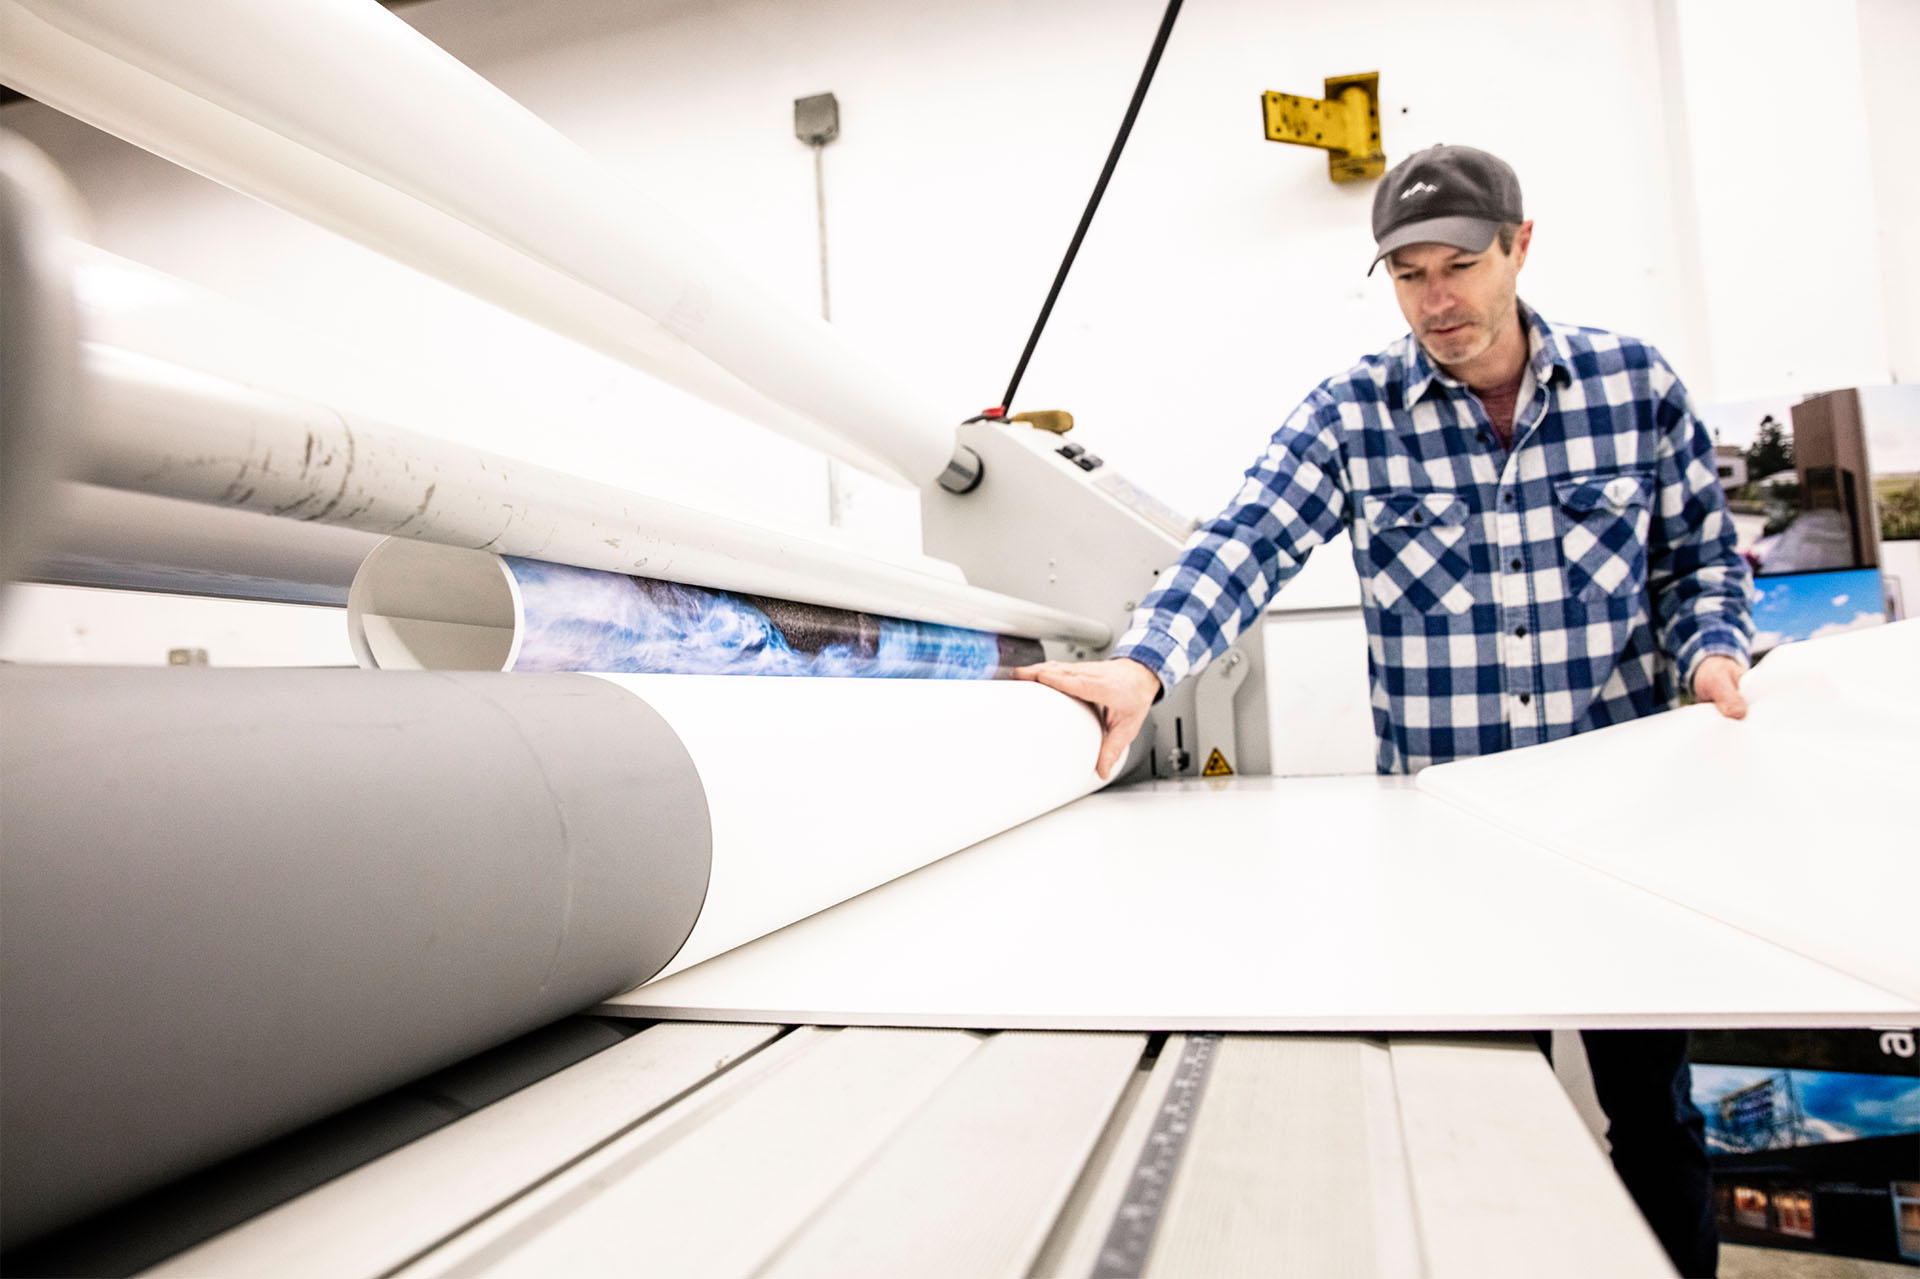
Designing graphics for your company’s signage and print needs is fun for some and a chore for others. Either way, high-quality printing is a must to make sure your brand stands out from the crowd. To make sure the process moves smoothly and stays within budget, you need to create a print-ready file for your printer.
At DRSi, we offer printing services to meet the needs of fast-moving businesses in the greater Seattle area. By taking the time to listen to your needs and goals, our team can craft solutions that work for you. We serve our clients with confidence and courtesy. Reach out today to learn more.
What Is a Print-Ready File?
Print-ready files do just what the name suggests. They are digital files that are 100% ready for high-resolution printing. A file that is print-ready will not require any alterations or enhancements for the printer to create your signs, documents and other marketing collateral.
If a file isn’t print-ready, the resulting prints will not look professional and high-quality. Because of this problem, expert printers will not use the file. When they have to fix the problem or ask you to do it, your print job takes longer and could cost more.
A print-ready file will pay attention to the following crucial components:
Bleed area
In the design and print world, a bleed refers to the background color, graphic or image that extends past the edge of the finished paper size. That is, it’s additional space past where the printer will trim the final image to size.
This extra margin allows the color or image to “bleed off” the page so that you don’t lose any of the desired work in the final product. The bleed should be .125” (3mm). For example, a letterhead sheet that incorporates bleed in its design will be 8.75″ x 11.25″ before trimming brings it down to a finished size of 8.5″ x 11″.
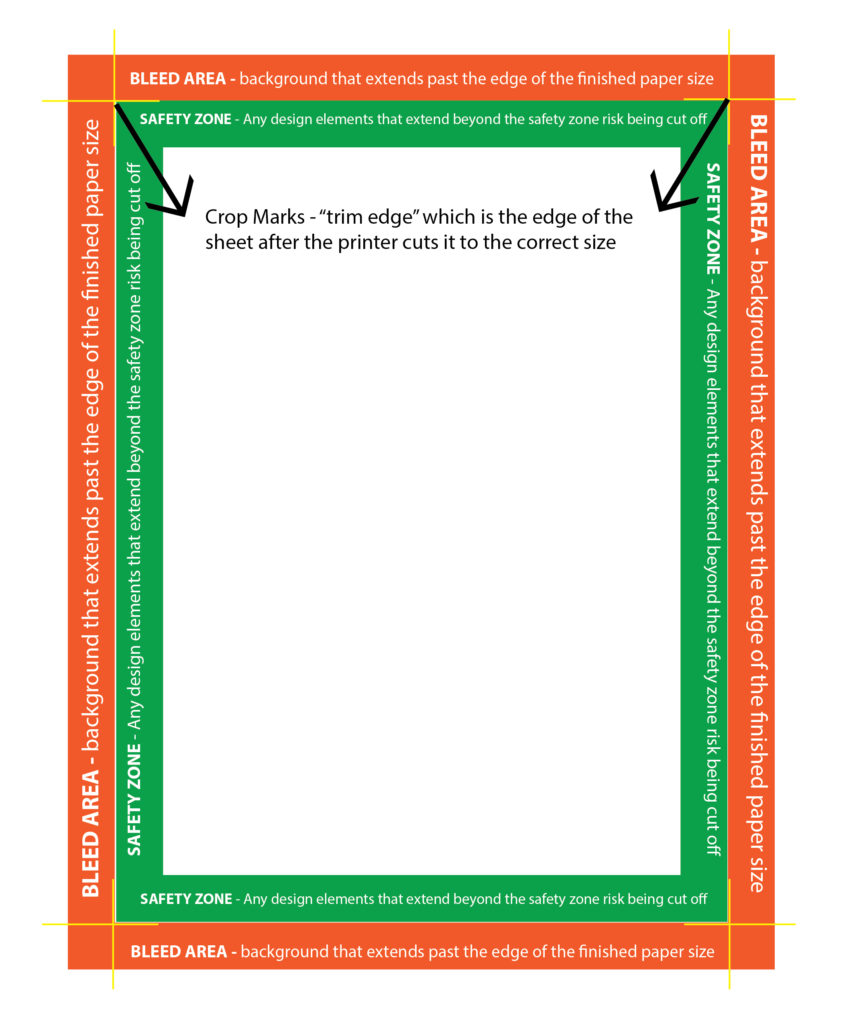
Crop Marks
A sheet with bleed is larger than its finished size. The crop marks show the “trim edge” which is the edge of the sheet after the printer cuts it to the correct size. You will lose any printed elements that extend beyond the crop marks or trim edge. Depending on the software you use to design your materials, they may use either “crop mark” or “trim edge” in their terminology.
How do you make sure you’re sending a print-ready file? Here are our tips and tricks for creating the correct file in Canva, Photoshop, and Illustrator.
Creating a Print-Ready File in Illustrator
Illustrator is another popular product in the Adobe suite. By following these steps and tips, you will be able to give your printer a print-ready file.
1. “Save As” Correctly
When your design is ready to save, go to File and select Save As. From your options, choose Adobe PDF. When you click Save, a new screen will open, prompting you to pick the Adobe PDF Preset. Choose Press Quality for the best results.
You will have the option to Preserve Editing Capabilities. This is generally unnecessary if the file is set up properly, so check with your contact at DRSi to see what they prefer. Choosing that option can make the file more difficult to send by email.
2. Set Marks and Bleed
On the left side of the screen, select Marks and Bleeds. Check the following boxes:
- Trim Marks
- Use Document Bleed Settings
If you already set the bleed in your original design, this step preserves that. If not, you can set it on the current screen. Set each section to 3mm or ¼”.
3. Save and Review
Click Save PDF in the bottom right corner and then open your document to review it. You should see some white space around the outside of your design, along with trim marks in the corners. Verify that no necessary parts of your design are outside the trim marks before sending your print-ready file to the printer.
Creating a Print-Ready File in Canva
Canva is a highly popular design platform used by businesses of every size. But what looks great as a social media graphic doesn’t always work well in print unless you follow these helpful tips. Note, some features are only available with the Canva Pro or Canva Teams plans.
1. Pre-design checklist for Canva print projects
Use this helpful checklist prior to starting a Canva print project to avoid costly rework and prevent delays:
- Check Resolution of your images. Make sure the image is set at a 300 DPI resolution. You can check resolution right from your computer. Fortunately, images found in Canva are already high-resolution.
- Add CMYK equivalents in the brand kit. Manage your brand colors in the Brand kit to create high-quality print designs. For Canva Pro or Canva Teams users, edit your brand colors by manually entering RGB and CMYK numbers. Learn more about CMYK in Canva here. You can find CMYK color pickers online.
- Margins and print bleed. Under the File menu, check “show margins” and “show print bleed” before you start designing. Margins ensure important design elements aren’t cut when printed and can be used as a handy guide during layout. Bleed ensures white space on the edges does not show when printed.
- Extend beyond bleed marks. Stretch images, background and text beyond bleed marks by .125″ on all sides. When sizing your file, you’ll need to add .125” to both the height and width. For example, if you need a 8.000” x 10.000”, your dimensions should be 8.125” x 10.125”. Convert inches to pixels here.
- Flatten your PDF. This converts your design with multiple layers into one layer that ensures that all your design’s elements get printed. Learn more below on how to flatten PDFs.
- Choose PDF Print. This is the only Canva file format that saves professional print quality at the required 300 DPI.
2. Click Share to Download
When you are done designing in Canva, you can click on Share up in the toolbar and select Download.
3. Choose Download Settings
Unlike other design software formats where image layers can be edited after export, Canva exports the image as one layer.
When you are ready to download, select PDF Print, from the drop-down menu. Check the box for crop marks and bleed and Flatten PDF. Choose how many of the pages you would like to download. And most importantly, choose CMYK (best for professional printing) in the Color Profile dropdown box.
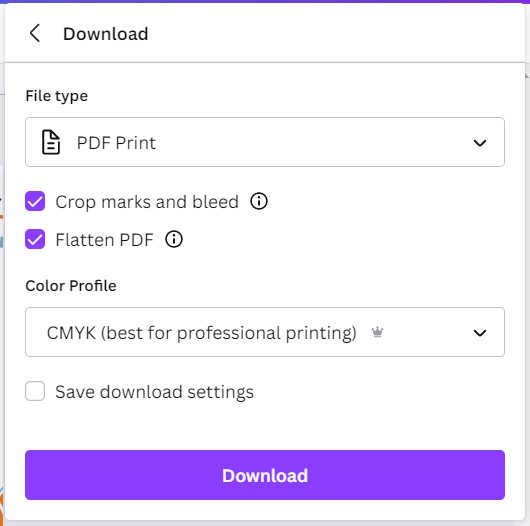
4. Save File
The PDF file will save to your computer.
What is a bleed?
Bleed refers to a background color, graphic or image that extends to the edge of the finished paper size and beyond. It’s difficult for printing equipment to apply ink up to the cut edge of a sheet of paper, so an extra .125″ (3mm) margin is typically added on each side of the design, enabling the background color, graphic or image to extend past (i.e., “bleed off”) the paper’s final trim edge. This extra bleed area will be cut off the printed sheet. For example, a letterhead sheet that incorporates bleed in its design will be 8.75″ x 11.25″ before being trimmed to a finished size of 8.5″ x 11″.
In contrast, a piece with no bleed keeps all the printed elements a minimum of .125″ (3mm) away from the edge of the paper on all four sides. Nothing is printed to the finished edge of the paper.


Bleed vs. No Bleed
In the image above, the illustration on the left is printed with bleed before trimming. When trimmed, the finished piece will have color or graphic content extending to the finished, cut edge on all four sides. The illustration on the right shows a page designed without any bleed. When trimmed, the finished piece will have an unprinted border on all four sides.
What is a Trim Edge?
A sheet with bleed is larger than its finished size. The “trim edge” refers to each edge of the sheet after it has been cut to its finished size. Any printed elements that extend beyond the trim edge will be cut off in the process of reducing the paper to its finished size.
What is the Safety Zone?
To avoid being trimmed off, text and other important content must stay within a “safety zone” that is a minimum of .125″ (3mm) away from the trim edge. Any design elements that extend beyond the safety zone risk being cut off in the process of trimming the paper to its finished size. For example, the safety zone for an 8.5″ x 11″ letterhead would be .125″ smaller on each side, or 8.25″ x 10.75″. Safety zone is especially important when you are printing a bound book.
Bleed Before and After Trimming.
The illustration on the left shows a document designed with bleed (finished size plus an extra .125″ (3mm) on each side). Because minor variations can occur when cutting the paper to its finished size, to avoid being trimmed off, text and other important matter must stay .125″ (3mm) away from the trim edge (the “safety zone”).
The illustration on the right shows the printed piece after trimming. Note the last “e” in “Example” has been cut in half because it extended past the safety zone and into the trimming area. Some of the artwork has been cut off for the same reason. Any elements that extend past the safety zone risk being lost in the process of trimming the paper to its finished size.
How Do I Create Bleed in my Design?
To create bleed in your design, add 0.25″ to the dimensions of your file, then simply make sure the background color, graphic or image you want to bleed extends off the final trim edge of the page by .125″ (3mm).
If you are creating your file in an application such as Photoshop, you must make your document height and width dimensions .25″ (6mm) larger than your final trim size. For example, if the finished size is 8.5″ x 11″ then make your document 8.75″ x11.25″. Position guides that are .125″ from each edge. For design purposes, these guides will represent where the paper (and any of your design elements) will be cut.
Position any background color, graphic, or image that you want to bleed so they extend past your guides, all the way to the outside edge of the document. Remember, the extra .125″ will be cut off after your piece is printed.
Our Team Is Ready to Serve Your Team
At DRSi, we understand how vital high-quality printing is to your marketing, growth, and brand awareness. With more than 30 years of experience, the DRSi team utilizes its industry-leading technology to create beautiful, professional signage and documentation for your business. Connect with us today to get your project started.
Our experienced and helpful production staff at DRSi is here to help. We look forward to assisting you with your next print project!